Tag Archives: chocolate

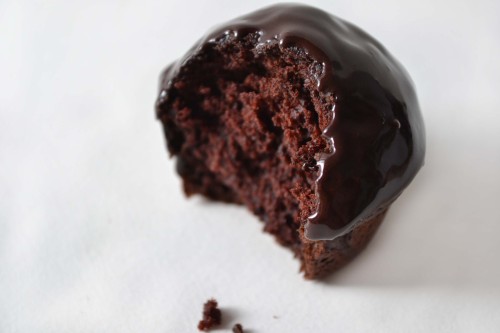
Mini (vegan) Chocolate Cupcakes

I have never been a morning person. I religiously hit snooze at least 4-6 times every morning and the only way to get myself moving is to quite literally leap from the bed and get straight into the shower. The shower must then be followed by coffee. Only then, well snoozed, braced for the day by hot water and caffeine, do I really feel like myself and feel prepared for the day. It may seem crazy then, that I also don’t really like to sleep in very late. It’s less about the time, and more about the pace. If I can snooze and drift in and out of sleep for awhile and languish in bed until I’m restless, I don’t mind getting up early. On days that I am not at work, like weekends or vacations (like this week) I feel a nagging sense of “wasting the day” if I am in bed past 8:30 or 9 o’clock. Gone are the days where sleeping until 11 was a normal weekend occurrence. I must be getting older.

I find on days like today, when there is nowhere that I need to be, and I know that everyone else in the house is either off to work or school or will sleep later than me, that the mornings can be a very lovely time of day. The term “me time” gets tossed around a lot but we all need it; time to recharge our batteries, think without being interrupted and move at our own pace. This particular morning I awoke at 4:23 am due to horrendous sinus congestion. After getting up and dealing with that, I went back to bed, checked my email, jumped on Twitter and realized that I was surprisingly awake for such an unreasonable hour.

Since going back to sleep all stuffed up seemed impossible and I was almost feeling, dare I say, chipper, I slipped away from the bedroom, cats in tow, and put on the kettle and soon had the French press brewing. (If I have nowhere to be, I can often postpone the shower and skip straight to the coffee with no ill affects.) Sitting on the couch with coffee, my leg being deftly massaged by a small cat I decided that baking up something for breakfast would be nice. In step with the unseasonably cold and drab weather that we have returned to, I thought of pumpkin loaf. Once my cup of coffee was done and the cat had grown bored of me, I set off back to the kitchen and found the requisite can of pumpkin puree, but alas … no eggs.  Now, had this been 10 am, 2 pm, 7 pm, etc. I might have tinkered and tweaked a pumpkin loaf to not include eggs, but since it was only quarter past 5 at that point, I abandoned the pumpkin and turned to an old standby: Vegan Chocolate Cake from The Joy of Cooking.

This cake, which I often make as cupcakes, is simply delicious. It is very quick and easy to make, is not too sweet and is always a hit. Don’t be thrown off by the coffee in the cake or glaze, it does not give you the mocha-like effect you might expect it to. Instead it enhances and deepens the chocolate flavour, and a deep, dark chocolate flavour is what you want from chocolate cake, especially if it’s for breakfast.

Mini Chocolate Cupcakes with Dark Chocolate Glaze

adapted from The Joy of Cooking 1997 edition

preheat the oven to 350°

Swapping out butter and milk in baking is usually a simple accommodation if you are attempting a vegan recipe. Eggs can be a bit trickier if you are unfamiliar with substitutions. These cupcakes are vegan and therefore they are egg-less but they get their lift from baking soda and vinegar. If you don’t have balsamic on hand, white vinegar will do just fine, balsamic just adds a nice depth of flavour. I have made this recipe many times with great success with some or all of  the oil replaced by applesauce, making them low fat or fat-free. 

Grease or line 24 mini muffin tins (or regular sized 12 muffin tin) (or a 9″ round cake pan)

In a large bowl, combine the following dry ingredients, whisking well:

1 1/2 C flour

3/4 C light brown sugar

6 tablespoons cocoa

1 tsp baking soda

pinch of salt

In a second bowl, mix the following wet ingredients:

1/2 C cold coffee

1/2 C cold water

1/4 C vegetable oil

1 Tbsp balsamic vinegar

1 Tbsp vanilla

Add the dry ingredients to the wet, all at once, stirring well to combine. Scoop into muffin tin. Bake for 18-22 minutes until a toothpick inserted in the center of one of the cupcakes comes out clean. Allow to cool in the pan on a wire rack for 5 minutes, then pop the cupcakes out and let them cool completely on the wrack.

For the glaze:

Stir together

1/2 C icing sugar

2 Tbsp cocoa

2 Tbsp cold water

3 Tbsp cold coffee

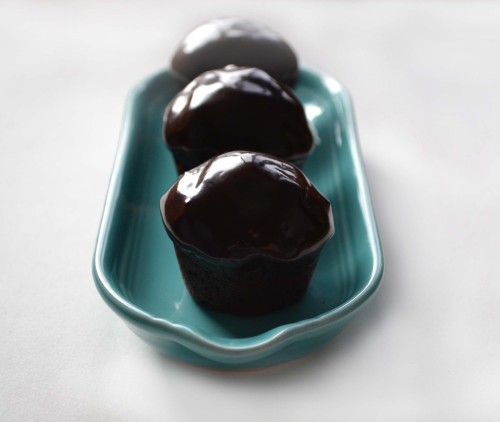
Mix well until a smooth, glossy glaze is achieved. Dip the tops of the fully cooled cupcakes in the glaze, allowing excess to drip off. The glaze will firm up as it dries. If you are adding sprinkles, non pareils, etc., do so immediately after dipping to ensure they stick. Store the cupcakes, once fully cooled in a sealed container at room temperature for up to 2 days.

4 Comments

Filed under Baking, chocolate, dessert, light, Summer, sweet, vegan, Vegan or Easily Made Vegan, Vegetarian

Islar Cookies

In East Vancouver there is a very small, independent bakery on the famed Commercial Drive called Elizabeth Bakery. It has been there as long as I can remember (at least 20 years) and although its store front is nothing fancy, easy to miss in fact, it faithfully produces many very delicious things, the greatest of all, in my opinion, being the Islar Cookie. The Elizabeth Bakery Islar Cookie is enormous; easily 6 inches across and so rich that it will turn the paper bag you buy it in transparent with butter in a matter of minutes.

But what makes the Islar Cookie so good?

Perhaps it’s the cookie itself: something between a sugar cookie and shortbread – not too sweet, meltingly tender and simple, simple, simple.
Or maybe it’s the generous dollop of apricot jam between the cookies that provides the sweet counterpart to the subtle cookie.

But more than likely it’s the chocolate, in concert with the cookie and the jam, that really sets the whole combination off. Only partially dipped, the dark chocolate adds a depth and interest of flavour, as well as stabilizing the cookies and preventing the sandwich from coming undone.

Now, I certainly make no claims to have successfully reproduced the exact Elizabeth Bakery Islar Cookie. The cookies seen here are a great substitute but they are not the same as the exceptional original. This version is good in a pinch and totally worth making at home, but the exact art and science of the original (as I know it) remains a mystery.

The 2nd Best Islar Cookies

makes 18-24 sandwich cookies depending on the exact thickness you make the cookies and how much dough you eat before you roll it out.

2 cups all purpose flour

1/2 tsp baking powder

1/4 tsp salt

1/2 cup unsalted butter

1/2 cup sugar

1 egg

1 teaspoon vanilla

1/4 teaspoon almond extract

Filling:

1/2 -3/4 cup your favourite apricot jam

For dipping:

1 1/2 cups dark chocolate chips, melted

Prepare 2 cookie sheets with parchment paper. If you don’t have parchment on hand, lightly grease them.

In one bowl, stir together the salt, baking powder and flour. Set aside. In another bowl, cream together the butter and sugar until well incorporated. Add the egg and continue to mix until smooth. Add the vanilla and almond extract. Add the flour mixture slowly, mixing well. The dough will be quite stiff.

Dump the dough out onto a sheet of plastic wrap. Wrap loosely and form into a ball. Flatten the ball to make a thick disk of dough. Allow to chill in the fridge for 15 minutes. Preheat the oven to 325° while the dough chills.

Once 15 minutes has elapsed, roll the cookie dough out to a thickness of 1/8″. Cut out cookies with a 2″ cutter. Place cookies on prepared cookie sheets and “dock” with a skewer or fork.

Bake the cookies for 12-14 minutes until golden at the edges. Allow to cool completely on a wire rack before making the sandwiches.

To fill them, press a small blob (1/2-3/4 of a teaspoon or so) of jam between the bottoms of 2 cookies. Fill all the cookies before dipping them, one at a time, in the melted chocolate. To get the crescent of chocolate on just part of the cookie, I dipped it straight down into the chocolate (melted in a shallow bowl) and rocked the cookie back and forth along it’s side to get a curved coating along one edge, but you could dip as much or as little as you like.

Allow the chocolate to cool and harden before stacking or storing. These are even better the second day, provided you can keep your hands off of them and because they are  sturdy and crowd pleasing, they’d make a great dessert for a picnic or barbecue.  Enjoy!

4 Comments

Filed under Baking, chocolate, cookies, dessert, Spring, sweet, Vegan or Easily Made Vegan

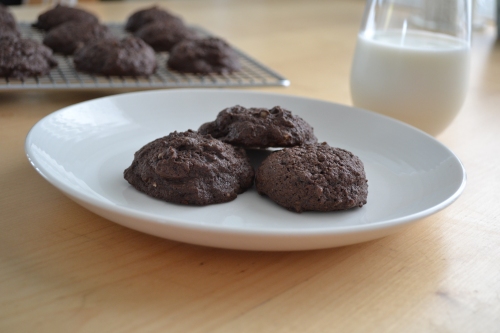
Double Chocolate Cookies with Walnuts

I don’t enjoy making cookies. That may seem weird coming from a food blogger but it’s true. I find them tedious. All the scooping, the multiple batches, forget it! Or if you’re rolling them, and cutting them?  Even worse! I’d much rather make something that cooks all as one in one dish. The problem with cookies is that even if you don’t like making them, you probably like eating them. These are no exception.

Much like when we discussed brownies and how brownie lovers fall into two camps, likewise, cookie fans (monsters?) seem to be divided as well between chewy and crisp. Not me. “Cakey” all the way.

If I’m incredibly honest, I have to admit that I didn’t necessarily know these would be perfectly cakey. I’m not that scientific with baking and this was a free form, no recipe to base it on, guess-work type adventure. I did know they wouldn’t be crisp, but as I began to dollop the extremely soft dough onto the pans, I wondered if they would strike that perfect chord of moist, cake-like and soft. It must have been a lucky day, because they did.

Double Chocolate Cookies with Walnuts

1 cup of unsalted butter, room temperature

1 cup of sugar

1 egg

1 tablespoon of vanilla

1 1/2 cups of flour

1/3 of a cup of cocoa

1 teaspoon of baking soda

1/4 cup of milk

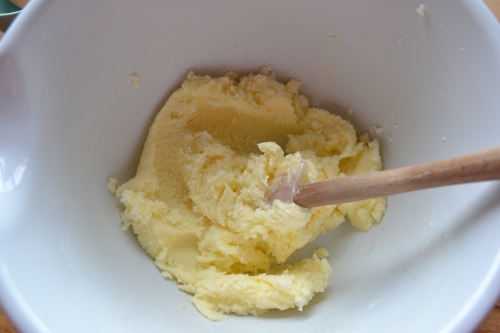
Cream the butter and sugar together.

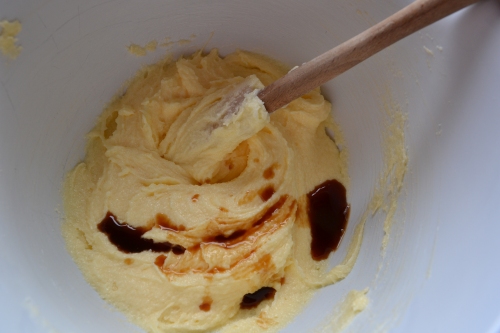
Add the vanilla. Add the egg and mix until light in colour and very light, about 2 minutes.

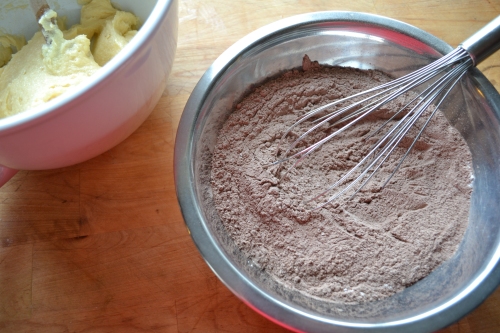
Combine the dry ingredients and incorporate them into the butter/sugar/egg mixture in 2 parts, alternating with the milk.

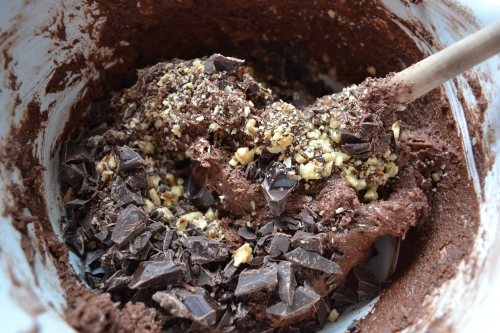
Chop the chocolate into rough chunks and shards.

Chop the walnuts as well and stir both into the batter.

Once it’s fully combined the dough will be quite soft. Scoop it by rounded tablespoons onto a greased cookie sheet.

Bake for 12 minutes at 350 degrees. The cookies won’t spread too much, and they will be dry on top and slightly puffed when they are baked.

Leave a comment

Filed under Baking, chocolate, cookies, dessert, nuts, Spring, sweet

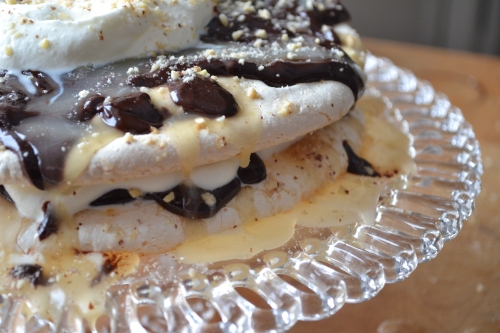
Pavlova with Chocolate, Caramel and Hazelnuts

We have a lot of cookbooks in our house. I don’t think I’m alone when I say that despite having a lot of cookbooks, I don’t cook with them often. Instead they are more like resource books, pages of near endless inspiration. I have read all of them, many of them much more than once, cover to cover, absorbing their insight and learning, wondering, questioning and memorizing. It shouldn’t be surprising then, that some of my most beloved books have incredible photos. As much as I love vintage cookbooks, they do lack the visual stimuli of contemporary books with their full colour, often full page, photos oozing with sharp realism and also, somehow, blurred fantasy.

One of our newest cookbook acquisitions is Seasons by Donna Hay which takes the reader/cook/food lover through a full four seasons of gorgeous, simple, foods, each appropriate to its time of year, each considered carefully and executed with artistic precision. It was while perusing the Spring section that Rob paused at a layered, cake-like concoction whose layers weren’t cake at all, but meringue. I had been brainstorming desserts to have with our all appetizer dinner as we watch the Oscars tonight and when he pointed out the beautifully layered Pavlova, I knew we had found a winner, or at least the inspiration for a winner. (I changed up the flavours and created my own luxurious combination here of a pale cream caramel, dark chocolate and toasted hazel nut.) Although Seasons identifies a similar Pavlova as Spring fare and we are still suspended in the clutches of winter, with unprecedented snow in February, this dessert is appropriately snowy and decadent enough to enjoy while watching Hollywood’s royalty and sipping a bottle of bubbly. I predict a sweeping win in the category of ‘Best Dessert’.


Layered Pavlova of Chocolate, Caramel and Hazelnuts

This recipe is constructed of  many parts. The meringue takes a while (a couple hours) to dry and crisp, so although this is not a tricky or difficult recipe, it does require some time and focus to have all the parts come together.

Part 1:The Nuts

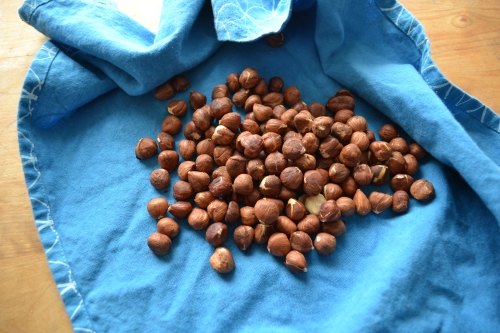
Begin with about 2 cups of raw hazelnuts. Toast them by spreading them out on a dry sheet pan and warming them at 375 degrees for about 10 minutes. They are ready when the become fragrant.

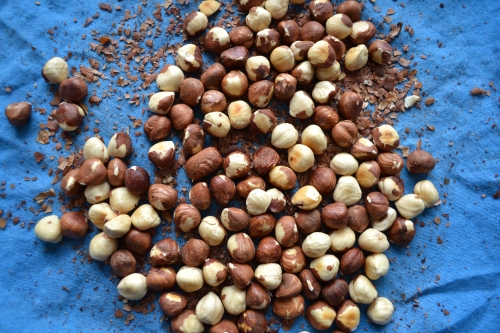
While they are still hot from the oven pour them out onto a clean tea towel. Bunch the tea towel up around them into a bundle and rub them with your hands through the cloth. This causes the nuts to roll around and rub against one another and the cloth and enables you to get most, if not all, of the skins to come off. Keep rolling and rubbing until no more skins come off. Carefully remove the nuts and discard the skins.

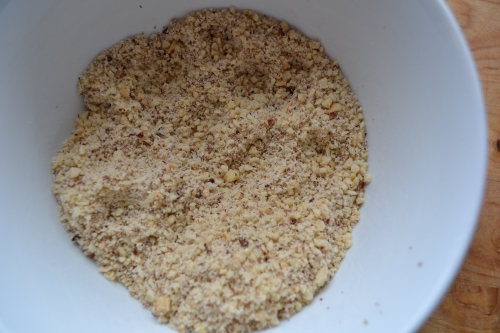
Once the nuts have cooled a quick blitz in the food processor will give you ground hazelnuts. Don’t grind them into flour, leave them somewhat coarse.

Part 2: The Meringue

Begin by preheating the oven to 200 degrees. The intent is not to bake the meringue as much as it is to dry it, hence the low oven.

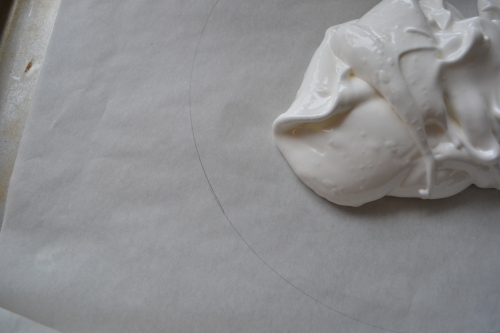
Prepare 2 sheet pans by covering them with parchment paper. Draw a circle (using a plate or pot lid) that is slightly smaller than the dish you plan to serve the Pavlova on. Set aside and make the meringue:

1/2 cup of eggwhites (4 eggs’ worth)

1 cup of sugar

Beat the egg whites in your mixer until they have stiff peaks. Slowly add the sugar until the meringue is softand glossy (it won’t be as stiff once the sugar is added).

Working quickly, immediately blob 1/2 the meringue onto the first sheet pan.

Spread the meringue to fill the circle. Leaving some jagged points and texture in the meringue is ideal. Repeat with the second pan and the remaining meringue.

Sprinkle both disks with some of the ground hazelnuts. Place in the low oven for 2 hours or until crisp and dry. if you are not building the Pavlova immediately, just leave the meringues in the dry oven to rest until it’s assembly time.

Part 3: The Caramel

In a small sauce pan, over medium heat carefully melt:

1 cup of sugar

into 1/2 cup of water

Allow the sugar to melt, undisturbed until it starts to turn a golden colour. It will boil and froth, but just let it do its thing. How dark you make your caramel is up to you, but be forewarned that when heating sugar it can go from delicious and golden to burnt in a matter of moments. I was aiming for a fairly pale caramel here, so when it had turned a light amber and thickened to the consistency of maple syrup, I pulled it from the heat and added:

3/4 cup whipping cream

1 tablespoon vanilla

The cold cream will make the caramel seize, but constant stirring and returning it to the heat will solve that. Stir again, over medium heat until the caramel is smooth. Remove from the heat and allow it to cool and thicken.

Part 4: The Chocolate

Melt, over medium heat, stirring constantly:

1 cup of dark chocolate pieces

with

2 teaspoons unsalted butter

1/4 cup of whipping cream

Part 5: The Assembly

Whip 1 cup of cream until soft peaks form.

Remove the dried and cooled meringue discs from their parchment lined sheets.

Secure the first disk to your serving plate with a dab of chocolate.

Drizzle over it:

1/2 the chocolate

1/4 of the caramel (this ensures that you will have some extra for serving)

1/2 of the remaining nuts

1/2 the whipped cream

Repeat with the second disc, etc.

Serving won’t be as precise as cutting, say, a cake, but be brave and just bust into the crisp/chewy layers of meringue and drizzle it with a bit more of the caramel if you like. Remember: this is a very free form dessert and it’s beauty is in it’s unique ‘imperfection’. It also tastes amazing. Enjoy!

1 Comment

Filed under Baking, chocolate, dessert, nuts, pastry, sweet, Winter

Chocolate Zucchini Loaf

When you’re in the depths of a west coast winter and the weekends are drizzly and grey and you’re indulging yourself in some well-deserved downtime (maybe an hour or two as the laundry does it’s thing, or as you catch up on some reading) sometimes you just want a little something to have with tea in the afternoon. Something that’s quick to make, low maintenance and gives you a high return on your minimal effort. Something sweet but not cloying that doesn’t make you feel like you have started your week in a nutritional deficit. Something just … right.

While most of North America tunes into the Super Bowl today, our household (a distinctly non-football-watching household) is enjoying the peace and quiet of a catch-up Sunday, as we all catch up on things from the week. Laundry will be done, beds will be changed, a Sunday dinner will be leisurely constructed throughout the afternoon. But in the middle of these low-impact activities there will be a short tea-time reprieve with this humble loaf.

Chocolate zucchini loaf is often a delicious result of a late summer bumper crop of zucchini. If you have ever grown zucchini you will understand because if their growing conditions are right, they will yield like almost no other vegetable and you will be up to your ears in zucchini.

So here it is, February, and obviously we are not faced with a zucchini surplus. However we almost always have some in the fridge because it is a well loved and oft used veggie in our house. When the itch for something for tea struck, my mind went almost immediately to the small, tender zucchini in the crisper drawer. If you have never had it and are dubious about the combination, don’t be. The chocolate is the star and the zucchini adds unparalleled moistness and cooks away almost to invisibility.


Chocolate Zucchini Loaf

preheat your oven to 375 degrees

1 cup grated zucchini (two small “courgette” size or about 1 medium)

1 1/2 cups all purpose flour

1/4 cup cocoa

1 tsp baking powder

1/2 tsp baking soda

1/2 tsp cinnamon

2 eggs, lightly beaten

1/2 cup vegetable oil

1 cup sugar

1 tablespoon vanilla extract

Grate the zucchini and set aside.

Combine all dry ingredients and set aside.

In a large bowl, beat eggs with a fork until well scrambled.

Add the sugar, whisk with a fork until well combined. Add vanilla and oil. Mix thoroughly.

Add the zucchini to the wet ingredients and stir to incorporate. Add the dry ingredients, all at once, to the wet. Mix together with as few strokes as possible until the mixture is wet, but not over-mixed.

Scrape into a well greased loaf pan and bake at 375 degrees for 55 minutes. To test, insert a skewer or toothpick in the center. If it comes out clean, it’s done. Allow the loaf to cool for 5 mins in the pan on a wore rack, then invert out of the pan and allow to cool completely on the rack before slicing and serving.


2 Comments

Filed under Baking, breakfast, brunch, chocolate, dessert, pastry, sweet, veggies, Winter

Tiramisu

Most of the time the recipes that I post here are my own version of something which I have imagined and then created. Occasionally I lean more heavily on a recipe from a book or website, but by and large, I just make this stuff up. I have a fairly extensive cookbook collection, but I rarely cook from them, I just use the recipes, anecdotes and pictures as inspiration. Before I make something, I deconstruct it in my head and try to figure out all the elements and how they fit together and in what proportion. Then I make it and see how it turns out. I’m proud to say I have a pretty good ‘batting average’ when it comes to new recipes, but even a ‘failure’ is usually consumable, just not all that it was meant to be. I share the ones that work and re-work the ones that don’t. Some recipes are a bigger ‘risk’ or better put: further out of my comfort zone or my immediate knowledge.

This tiramisu was a bit of a gamble.

I have had tiramisu many times, but I’d never made it. I understood the basic building blocks and I knew what the finished product should be like, but all the steps in between were a bit foggy. I considered looking up a few recipes online first, but decided against it. I wanted it, however it turned out, to be my version. So I jumped right in.

It worked. It has all the richness you could ask for but the unmistakable lightness as well. It’s boozy, but not over powering and the texture is soft and unctuous but not complete mush. Is it entirely traditional? No, I don’t think so. But it looks like tiramisu, smells like tiramisu and most importantly tastes like tiramisu. I’m going to go ahead and call this one a winner. Let me know what you think.

Tiramisu

1 400g package of crisp Italian ladyfinger cookies

1 cup of very strong coffee or espresso

2 tablespoons Bailey’s liquer

3 eggs

1 cup of sugar

1 tablespoon of vanilla

2 cups ( one 454g tub) of mascarpone cheese (substitute cream cheese if you can’t find mascarpone)

1/2 cup of sour cream

1 tablespoon of cocoa powder for sprinkling on top

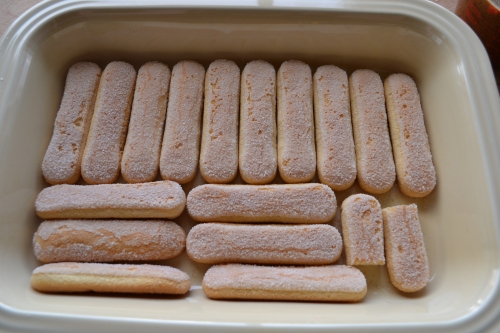
Prepare the coffee and stir in the Bailey’s. In the bottom of a 9×13 dish, arrange an even layer of ladyfingers.

Drizzle with half the coffee mixture, ensuring each cookie gets doused. Whatever is in the bottom of the pan will be absorbed.

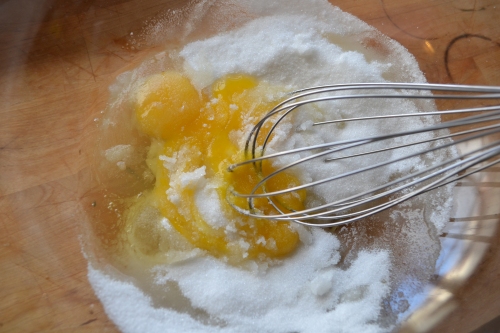
Next, make the mascarpone cream. Start by beating together the eggs and sugar with a wire whisk in a double boiler (or a heatproof bowl set over a pan of simmering – not boiling – water).


Cook the egs and sugar, stirring almost constantly for about 10 minutes until the mixture is a very pale and thickened custard. You’ll know it’s thickened enough when you lift your whisk the custard drips and makes an obvious ribbon on the surface.  Remove from heat, continuing to stir it until it is warm but no longer hot, about 3 minutes.

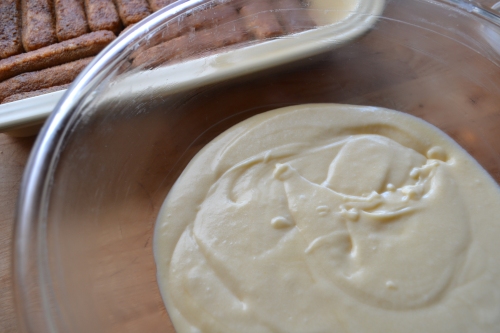
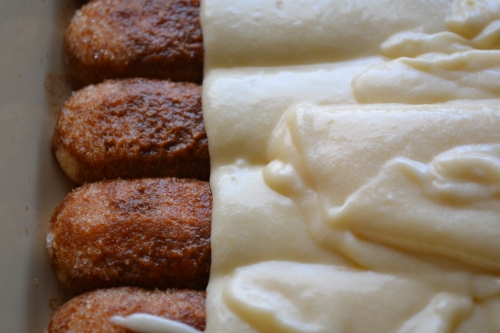
Add the mascarpone, 1 cup at a time, stirring to incorporate before adding more. Once the mixture is smooth, stir in the sour cream. Pour half the mascarpone cream over the layer of soaking ladyfingers, smoothing it with the back of a spoon to get it into the corners.

Repeat with a second layer of ladyfingers, drizzle on the rest of the coffee and top with the remaining mascarpone cream.

Sift the cocoa over top. Refrigerate for at least 2 hours before serving.


1 Comment

Filed under chocolate, dessert, light, lunch, Summer, sweet, Winter

Brownies

There seems to be two schools of thought when it comes to brownies: some are cake-like and chewy, some are damp and dense and almost fudge-like. Since there is no leavening beyond the eggs, these brownies won’t rise. In fact they will puff slightly, develop a crust and then sink. This is thanks to a greater volume of chocolate than flour, much like a flourless chocolate cake. Many people will take brownies any way that they can get them, but for some of us, myself included, only the damp, fudgey ones will do. This recipe delivers just that. It is a simple recipe but decadent enough to be relegated to special occasions or extreme chocolate cravings. Enjoy!


Brownies

preheat the oven to 350 degrees

Melt together over a double boiler (or a heat proof mixing bowl set over a pot of simmering water):

1 cup of chocolate chips

1/2 cup of butter

3/4 cup of sugar

Stir frequently until the mix is fully melted and glossy.

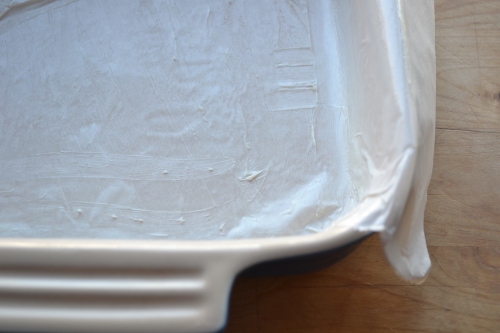
Set the chocolate mix aside to cool slightly. As it cools, butter and line with parchment, an 8×8 inch baking dish. Allow the paper to hang over the edge to act as “handles” for lifting the brownies from the pan later. Lightly butter the paper as well!

To the now cooled chocolate mixture add:

1 tsp. vanilla

2 beaten eggs

Mix quickly and thoroughly then add:

3/4 cup of cocoa

1 tablespoon of very finely ground coffee or instant espresso

Once fully combined, add

3/4 cup all purpose flour

1 cup chopped walnuts (entirely optional)

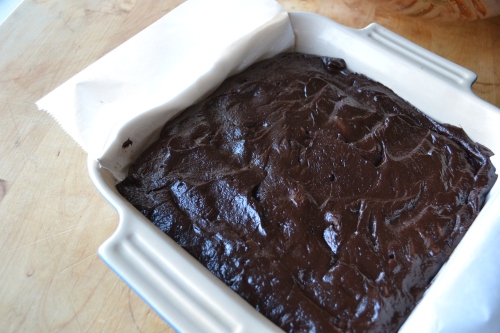
The batter will be sturdy. Smooth it into the prepared pan and bake for 45 mins. When tested with a toothpick the crumbs attached to it will be quite damp. Don’t let this stop you!

Allow the brownies to cool for 15 minutes in the pan, then carefully lift our with the paper “handles” and allow to cool completely on a wire rack. Cut into 24 small pieces.


3 Comments

Filed under Baking, chocolate, dessert, pastry, sweet, Winter